
Photographing in snowy weather adds an extra dimension to wildlife images. However, there are a few things that you have to do a little differently to normal in order to produce a good image. In this post I'll look at exposure and white balance adjustments that you'll need to make when shooting in snow.
Light, light everywhere
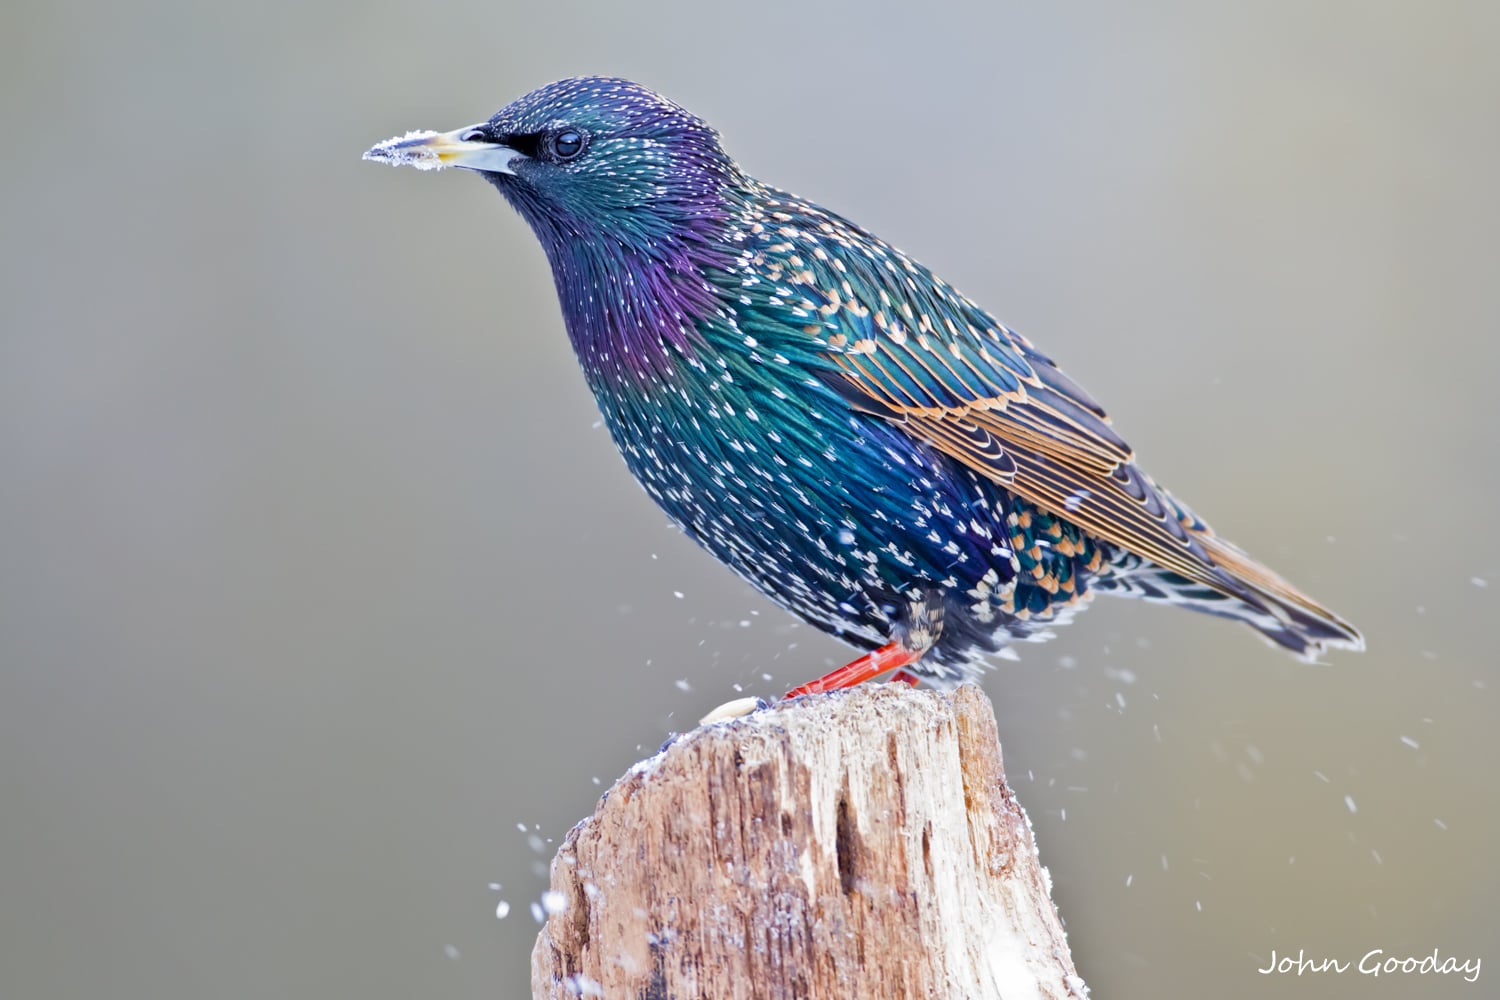
A fresh covering of snow does wonders for an image. A normally dark and gloomy scene is made brighter as light bounces off of the snow. And onto your subject. Better still, because the reflected light is coming up from the ground it illuminates those normally tricky shadow areas underneath the subject enabling you to capture lots more detail in these areas than normal. If the snow is on a flat surface, a lot of this reflected light is polarised in a single direction - this can often make the colours in birds wings really stand out. You can see all this light at work in the image of the Starling below - the bird seems to radiate colour where we normally see muted tones that appear more grey.
If it's so bright, why are my pictures darker than normal? And what should I do about it?
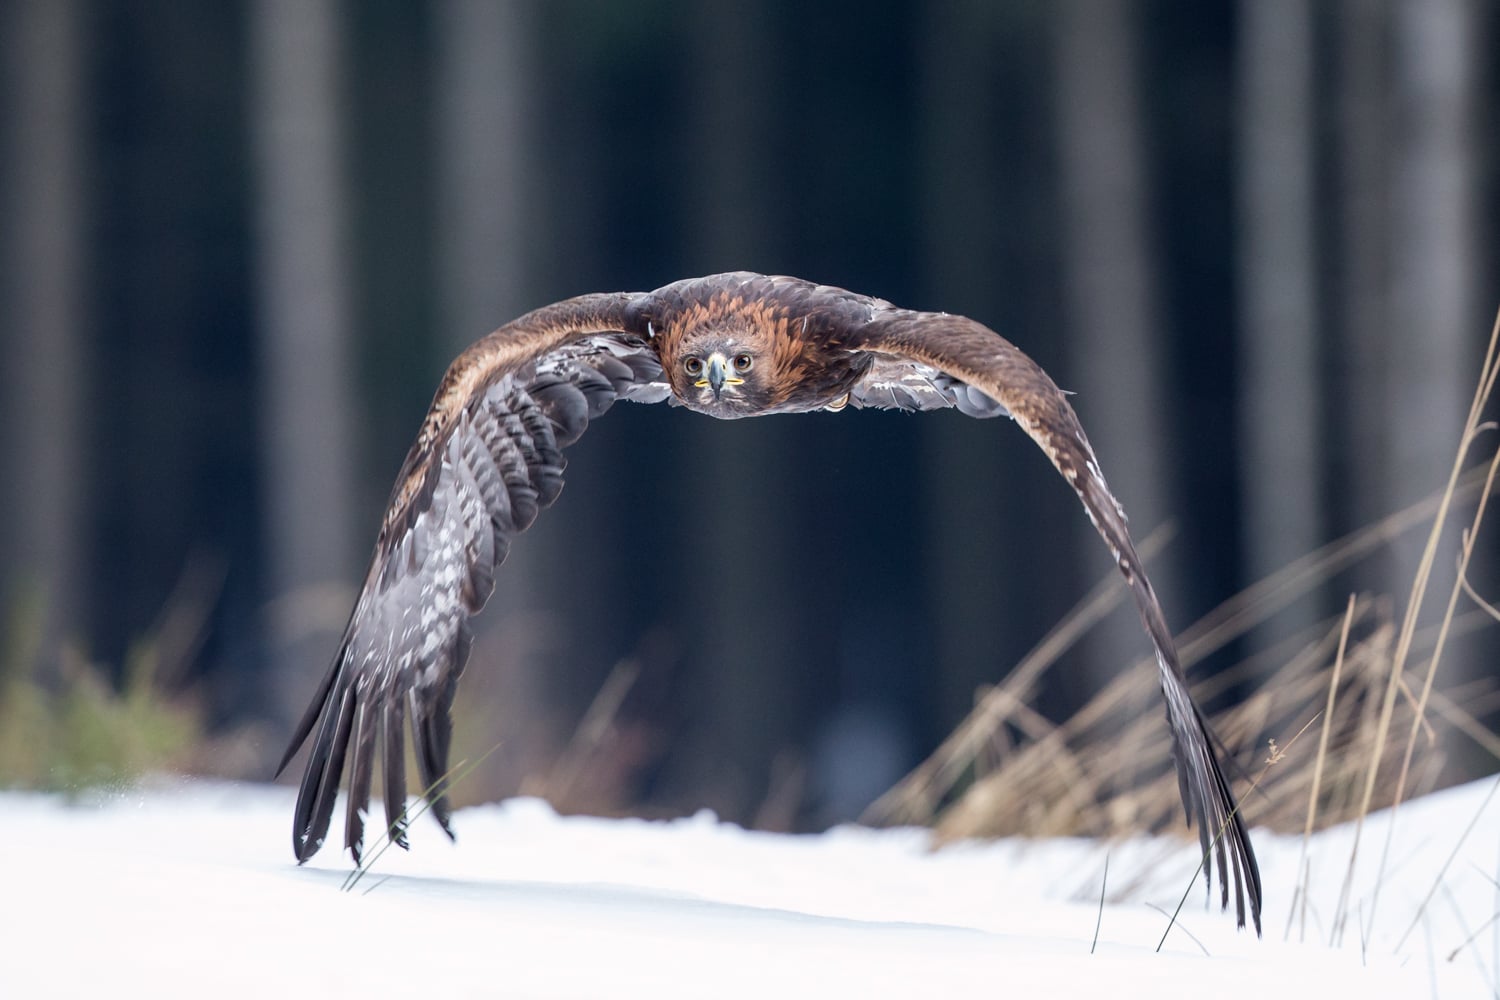
Your camera gets a bit confused by all that snow. It is a simple machine, not overly encumbered by too much in the way of intelligence and doesn't know whether it's looking at a field of snow or a coal cellar. However, it's been programmed to assume that when you average all the different levels of light in a scene they'll even out as mid-grey. And, the world being as it is, this usually works. Unfortunately, snow rather mucks up this line of camera reasoning. There's a lot of bright white stuff around that makes the average light levels quite a bit brighter than mid grey. The camera thinks that the lighter average that it's actually seeing is meant to be mid grey, so it converts the whites to darker mid grey, and makes all other shades in the image correspondingly darker. That's why if you go along with the suggestion made by your camera's internal light meter you'll get a rather dim image. This is exactly what has happened in the first picture of the Eagle snacking on a Fox below (Fig 1). This is a screen capture from Adobe Lightroom and is a raw image shot in Aperture Priority mode (Av) with no adjustments to the camera settings. In short - it's what the camera thinks the scene should look like! The histogram at the top right confirms that things are not right - it's shifted to the left (the darker shades) and there's no white or light shades (right end) at all.

Fig 1: the image settings chosen by the camera
What do we need to do to fix this? Well, ignore what the camera is telling you and add some brightness. If you are shooting in Program, Shutter (Tv) or Aperture (Av) priority mode, add some exposure compensation. You'll usually need between +1 and +2 stops. If you're in manual mode, open up your aperture/ lower your shutter speed by this amount. I can't recommend strongly enough that you turn on your camera's highlight warnings. This will show overexposed areas on a played back picture as flashing red. A few small patches of flashing red in the snow are OK, but if most of the snow has turned red then you need to reduce the exposure compensation to avoid burning out your shot.
Fig 2 is a shot of the same Eagle taken a few seconds later, after I had adjusted my camera to add 1 and 2/3 stops of exposure compensation (you can see that the shutter speed is 1/200th instead of the original 1/640th if you look at the date below the histogram). This image is a lot brighter, with more detail in the formerly dark areas. The histogram has movedto the right without being squished up against the far right hand side indicating that I haven't burnt anything out.

Fig 2: Adding 1.3 stops of exposure compensation on the camera brightens the image
Although the photo is a much better exposure than the first shot, it's a bit washed out and lacks punch. Nevertheless, it's likely to be the best we can get in these conditions with a raw file. We can enhance the photo a little in editing with a few very simple changes.
Fig 3 is a lightly edited version of the file in Lightroom - you can see the changes I've made in the lower right hand pane. The reason that the image is a bit flat is because it's not making use of the full range of darks and lights - the values are compressed into part of the histogram, albeit a large part. There's a gap in the histogram on the left side where we'd expect to see darker colours. To fix this, I've slide the black slider left to bring back some of the blacks, then slidthe shadow slider right until the shadow areas lighten up again. I've done a similar thing on the right hand side of the histogram - raising the white slider to whiten up the snow, then sliding the highlights left a little to get a little more detail in the bright areas. I've also boosted the contrast slightly (this emphasizes the split between left and right hand side of the histogram) and raised the clarity a little bit, which adds contrast to the middle section of the histogram. It's easy to get carried away with the Lightroom sliders, so be careful when adjusting them.

Fig 3: a few minor adjustments in lightroom puts lost contrast back into the image
So, if I'm having to putting punch (and some of the darks) back into the image, wouldn't it have been easier to have just gone with the original camera settings and take our first dark image (Fig 1) into Lightroom and added exposure and contrastinstead of mucking about changing the camera settings? Well, yes... but the image would not be as good. Image noise is always much greater in shadows than light areas. If I'd lightened the dark areas artificially, that noise would show up more and I'd see more of it (and less detail) than on our third image above.
Don't let all that snow give you the blues
In the past, pictures taken in snow with a digital camera tended to have a strong blue colour cast. This was a result of the camera's automatic white balancebeing fooled by the unusual amount of white in the scene which caused it to set the white balance to a lower colour temperature than it should, Recent DSLRs have become much better at guessing white balance correctly in snow scenes, and the eagle image is only slightly bluer than it should be. This is easily fixed in Lightroom by shifting the colour temperature slider to the right a little until the snow becomes white.
Spotting a subtle blue cast can be tricky, so here's a technique that I use. Normally, Lightroom has a default background colour of mid-grey. This is normally ideal for editing work as it doesn't confuse your brain into interpreting colours in a scene incorrectly (your perception of a particular colour is changed in the presence of another vibrant colour surrounding it). However, mid-grey backgrounds don't help us evaluate when snow is white or slightly blue. So, when checking the colours in a snow scene I change Lightroom's background to be pure white - this makes any blue in the snow readily visible. The easiest way to change the background in Develop mode is to right click in the border surrounding the picture and this will bring up a choice of background colours.

Fig 4: increasing the colour temperature to remove the blue cast
Finally, here's a full screen version of the finished picture:

Fig 5: final image
A few practical tips when photographing in the snow
Auto focus settings are also important. If the snow is falling, you may find that your autofocus locks onto nearby snowflakes in the sky rather than your intended target. If this happens, try changing to a single AF point and use this to focus on the subject. If the focus is still distracted by the snow then you'll have to change to manual focus mode and adjust the focus ring on the lens to get the image sharp.
Finally, here are a few general tips that I've learned from experience:
- wear warm, waterproof clothes (I find ski jackets, ski trousers and snow boots to be ideal - they have all sorts of flaps and toggle to prevent snow getting in. ) - that way you can lie in the snow to get eye level shots of your subject. Don't forget a warm hat as well. If it's really cold, or you plan to be out for a long time, thermal underlayer clothing and socks really help. It's a good idea to take spare socks and another pair of footwear to change into when you finish.
- wear two pairs of gloves - thick and thin. Remove the thick gloves when you want to photograph and put them back on to warm up between shooting sessions. Thin gloves with rubber grips on the fingers work best for manipulating camera controls(I really like Roekel winter rock climbing gloves for this, although they are a little pricey).
- if you are going to be standing or sitting still on the ground for several hours, chemical hand warmer pads placed between your socks and inner boot soles will keep your feet warm. (You can also purchase battery heating for snow boots if you plan to spend a lot of time in sub-zero conditions)
- if you wear glasses, it's useful to take a spare pair and cleaning clothes to cope with freezing / misting lenses
- keep camera batteries in an inner coat pocket close to your body until you are ready to use them - cold drains battery levels
- a waterproof camera / lens cover (available from places such as www.wildlifewtachingsupplies.co.uk, www.wex.com etc. will prevent water damage to your camera from melting snow. also pack plenty of lens tissues / lens cloths to enable you to safely remove snow from glass elements
- cold tripod legs can stick to your skin and peel it off - make sure to wear gloves, or fit leg warmers to your tripod
- a flask of hot coffee, tea or soup can greatly improve a long shoot in the snow