
Nov 02, 2014

(Image: Canon EOS 1DX, EF70-200mm f/2.8L IS II, 1/250 sec @ f/5.6, ISO 2500, 2 x Profoto B1 Air flash units, Apollo 50" Mega JS softbox, Elinchrom 100cm Deep Octa softbox)
Here at Gooday Towers, we're seeing a marked reduction in the number of hedgehogs turning up of an evening. A sign that the weather is getting colder and that our spikey friends' thoughts are turning to hibernation. With that in mind, I thought I'd better take the opportunity to photograph some before they all go to sleep for winter.
The problem with photographing hedgehogs is that they only tend to come out when it's dark. This makes some kind of lighting set-up a necessity both for seeing the creatures well enough to focus the camera on them, and for taking the picture itself. Some people find that a continuous light source, like a halogen lamp or a strong torch, work well. Here in deepest Essex, our hedgehogs take one look at a strong light and run in the other direction. That means we have to try something else, and flash is the obvious candidate. So, the question is: how do we get a nice natural looking image when using flash? The shot above was taken at darkest night time using two flashes This is what I did...
Generally, I try to do three things when lighting with flash:
- Get the flash off the camera to avoid that rabbit-in-headlight look
- Make the flash light source appear as big as possible to avoid harsh contrast (by using light modifiers attached to the flash)
- Use multiple flashes from different angles to light around the subject and so avoid one side of the hedgehog being bright and the rest nearly dark
Getting the flash off-camera means either using long flash cables or, better still, using a radio trigger system. Radio triggers are now reasonably cheap items and there's a wide choice out there - PocketWizard, Yongnuo, Odin, Cactus all make triggers that allow you to control flashes from a unit that sits in the hot shoe of your camera (or even via a menu on the camera itself). Canon and Nikon also have their own (expensive) radio systems if you want to stick with a single manufacturer. Try and get models that support TTL flash functionality - these let the camera talk to the flash units to set the flash exposure automatically. When you're shooting a moving subject like a hedgehog, TTL takes care of adjust the flash brightness as your quarry moves nearer or further from the flash units. To use TTL, you'll need to have flashguns that support it. Both Canon and Nikon make a range of speedlights with TTL capability, as do a number of third party manufacturers. Recently, I've been using the Profoto B1 Air system - these flashes are much more powerful than speedlights (typically producing about 10 times more light) which lets me light larger areas.
Making the light source as large as possible creates nice soft light - light which doesn't produce strong contrast between shadow and highlight but instead allows you to see the details in both dark and light areas of the image. The most practical way to make a tiny flash gun seem bigger is to use it with a modifier like a softbox or an umbrella. Of course, there are limits - if you put a small speedlight into a massive softbox, it will spread the light out nicely but it will also dim it drastically. If you're using speedlights, I'd suggest sticking to a small umbrella (2-3ft diameter) of the shoot-through variety (umbrellas that are used as reflectors make the light much dimmer) or a softbox of a similar size. With more powerful flash, like the Profoto B1, you can use very large modifiers - I like the Westcott 50'' Mega Apollo, pictured below. This is a light source that's 200+ times the size of the average hedgehog and it produces very soft light over a wide area. The Apollo is also very easy to set up as it opens up just like an umbrella (and inserts into the umbrella slot on a lightstand). If you've tried to assemble a standard studio softbox, you'll know how much more fiddly that it. You'll need to avoid using the mega Apollo on a breezy night, unless you want flashes crashing to the ground about you (and I always use sandbags to secure the light stands).
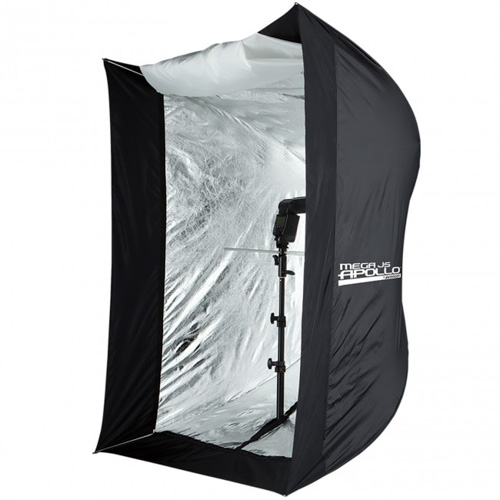
The Westscott 50" Mega JS Apollo softbox is BIG!
Using multiple flashes to light the front and back of a subject results in a much more natural image. I usually use two flahes - a main light aimed at the front of the hedgehog, and a fill light aimed at the side/rear. The main light is set to be brighter than the fill light (I usually adjust the flash exposure compensation to make it between 1 and 1.5 stops brighter). This is essential as otherwise you'll get two sets of shadows in different directions (which looks very weird - the technical term is cross-lighting) and the light will be very even making the hedgehog look a bit two-dimensional. When using TTL, make sure that you (well, the camera that is) can't see the part of the flash or softbox that emits the light - you'll need to position yourself behind the flashes to do this. If you can see the flash, then the TTL system will become very confused and get the flash exposure catastrophically wrong.
You'll need a means of focussing your camera in the dark. A weak torch shone at the hedgehog will usually work.The Profoto B1s have a built in LED modelling light which works very well. I set it to a low brightness that doesn't scare the hedgehog but just allows me to see enough to focus. Depending on how good your camera's autofocus system is, you may have to focus manually. (I find on Canon cameras autofocusing in live-view (i.e. contrast detection AF) will work in much lower light than when using the system normally (phase detection AF)... but focus is quite slow. If your lens has focus distance limiters, using them can speed things up a little). Get down to the hedgehog's level for the best photos - that normally means lying on the ground so a groundsheet, or at least waterproof clothing, is a good idea.
Once you've positioned your flashes you'll need to take steps to persuade your subject to stand in the right place - i.e. in front of them. Hedgehogs love meal worms and I find that if you lay a trail l of these the beast will usually follow it, stopping to munch whenever it gest to a worm.( If you look closely at the grass in the photo you'll see a few dried meal worms). You can focus when the hedgehog is eating and shoot just before it moves off.
I've drawn the full lighting set-up below to show you exactly how the photograph was made (OK, I'm no Joe McNally - my diagrams are a bit rough-and-ready, but hopefully you get the idea).
Once I've been using the Profoto B1's for a few more months I'll write a review of my experiences with them, but so far they're proving to be extremely useful.
