

Introduction
I've just spent a few days on the Island of Skomer, a short boat trip from the most south-westerly point of Wales. Every summer, Skomer becomes the temporary home to thousands of breeding Atlantic Puffins. There are no predatory mammals on the island, so the Puffins can safely nest in their burrows, leaving frequently to collect sand eels and small fish for the young Pufflings. I thought I'd share a few of the photos that I captured on the Island, along with some of the techniques I used to take them.
Portraits
Matching the exposure in sky and subject with flash

Canon EOS 1DX, EF16-35mm f/2.8L IS II, 1/250 sec, f/16, ISO 250, EX600-RT Speedlight with CTO gel and 30cm softbox
The shot above is a wide-angle close-up taken at the end of the day at16mm focal length. The Puffins are fairly relaxed around people and I found that if I sat down on the path after a while some of them would wander over to see what I was doing (the softbox on my flash gun seemed to particularly interest them). I certainly wouldn't condone chasing them around to get the picture as this would distress the birds. I used a small aperture (f/16) to create the diffraction effect around the sun - wide angle zoom lenses are especially good for getting this effect which essentially exploits a flaw in the optics of the lens. Generally, I shoot these sort of images in manual exposure mode, adjusting the ISO and shutter speed until I get the right exposure in the sky. You can, of course, use Aperture or Shutter priority exposure mode, dialling in negative exposure compensation to get the sky to the right level. However, this may be prone to changing as you move viewpoints and the camera (mis)interprets the light from a slightly different angle. Once I'd got the sky and sun looking the way I wanted, I set about compensating for the resulting underexposure of the Puffin and grass. To do this I added extra light via fill-in flash on foreground with a Speedlight. This had to be gelled to match the colour temperature of the evening light via a CTO filter on the flash head (using an ungelled flash would have given the foreground and Puffin a bluish colour cast compared to the orange evening light). I used a small 30cm softbox on the flash to give a softer light than I'd have got with the bare flash head (a bigger softbox would have been even better but I neglected to take one with me). In this shot the flash was mounted directly on top of the camera - this works for fill-in flash when the sun is more or less directly in front of you. For fill in flash, using the ETTL flash mode on the camera usually works quite well if you spot meter on the subject. However, you may need to dial the power up or down a bit using flash exposure compensation if the light conditions fool the camera's metering system. The flash will generally be firing at fairly low power, especially late in the day when the sun is more subdued (while I was shooting, somebody came over to tell me that they thought my flash might not be working properly as the output was barely visible). You don't want too much flash otherwise the image will appear false.
If you don't have a flash (or perhaps a reflector) to hand, you can still take the shot but you'll need to lighten the foreground in post-processing. This generally creates a lower quality image with less contrast and more noise (and I can't help thinking that it's much more fun to spend time fiddling about with flash guns in the open air than locked away with editing software in a darkened room...)
Let's take a look at another shot, this time shot at noon on a clear sunny day. (Yes, I know harsh sunlight is not ideal for photography but it seems nobody has mentioned this to the Puffins... )

Canon EOS 1DX, EF500mm f/4L IS II, 1/250 sec, f/11, ISO 50, EX600-RT Speedlight zoomed to 200mm
Here, the bright midday sun is behind and slightly left of our Puffin. Lowering the exposure (either with exposure compensation in aperture/shutter priority mode , or changing the aperture/ISO in manual mode) to keep a nice saturated blue colour in the sea results in a silhouette of the Puffin. Once again, flash is needed to light the foreground so that we can see our subject while keeping the sea dark. This shot was taken quite a way back from the bird using a 500mm lens (I wasn't about to go mountain climbing on the high rocks). Generally, Speedlights lack the power to match strong sun at a distance. However, the higher end models often have a zoom function that focuses the light they produce more intensely over a narrow area. For midday distant shots like these, you'll need to set the Speedlight to its maximum zoom setting (200mm in the case of the EX600-RT I was using).. and possibly use more than one Speedlight if that's still not bright enough (or you could use a more powerful flash than a Speedlight e.g. Profoto B1/B2, Elinchrome Quadra/Ranger...). You'll need to make sure that the light is aimed carefully at the subject - I'd suggest mounting it directly on the camera so that the light will move with the lens as you track your subject. Another problem that we have to deal with is shutter speed - using a flash limits the maximum shutter speed to the 'sync speed' of the camera, normally 1/200 or 1/250 second depending on the model. This is a bit of an annoyance for two reasons (1) 1/250 places you firmly in the camera shake zone with a long (300mm plus) lens and (2) it can be difficult to get the image dark enough when your stuck at a relatively slow, light gathering 1/250th second. You'll need to set your ISO to minimum and stop down the aperture to darken the image. Stopping down the aperture throws quite a lot more of your image into sharp focus, so you'll need a very distant background if you want to retain blur, and as little foreground as possible (or use the mushing technique described later). To overcome (1), the camera shake problem, you'll need to use a sturdy tripod, soft touch on the shutter and pick a moment that the Puffin is still.
(Some people may wonder whether we can use High Speed Sync mode, available on some cameras and Speedlights, to shoot at a higher shutter speed than 1/250th. In short - not during the middle of the day: HSS reduces the power of Speedlights significantly to apoint that simply isn't bright enough to fill in the shadows at midday.)
Mushing the foreground (aka 'the Ben Hall technique')

Canon EOS 1DX, EF70-200mm f/2.8L IS II @ 190mm, 1/1000 sec, f/2.8, ISO 100
I think most people are familiar with the techniques for getting a soft, blurred background to make the subject stand out (i.e. use a distant background, wide aperture, long lens and get closer to your target). However, it's also useful to blur out foreground as well. This isn't always easy as foliage and grass close to your Puffin will often be quite sharp, even at maximum aperture. At times like these, when I want to isolate the subject in a sea of blur I use a technique that Ben Hall (a talented photographer with RSPB images and frequent contributor to photographic magazines) has made his trade mark. If you get really low to the ground you can shoot through grass, earth,snow etc) immediately in front of the lens to create a field of soft mush at the bottom of the picture. By varying your position you can usually get the mush to cover any sharp-focussed foliage in front of the subject, as in the image above. It's a simple but very effective technique that I've used to remove all sorts of foreground annoyances in the past.
Here's another example of the mushing technique... Note that the background (a rock face in shadow) is quite dark so I don't need to lower my exposure to retain background detail and thus don't have an underexposed foreground so a flash is unnecessary).
Canon EOS 5D Mark III, EF500mm f/4L IS II, 1/800 sec, f/4.5, ISO 400
Flight shots
Puffins don't like to hang about. They are the lead-footed boy racers of the bird world. While sleek, sporty birds like falcons might ultimately be much faster in a dive, Puffins make up for this by flying everywhere (and I mean everywhere) flat out, as fast as their little wings will propel them. I don't think they really know the meaning of the phrase 'careful flyer'. If a Puffin were a car, it would be a GTI hatchback with oversized wheels, a dayglow paintjob and an exhaust the diameter of a water main. This makes photographing them on the wing fun.
Going sideways
Photographing birds flying straight towards you is relatively simple - little camera movement is required and camera autofocus systems more readily lock onto the nearest point (i.e.the head) rather than latching onto the wing tips, as is often the case when flying in other directions. So, lets go straight to the more tricky problem of nailing a Puffin flying past you right to left (or vice versa).
The ideal lens for this would be a wide aperture 300mm telephoto, say an f/2.8, which focuses fast. I neglected to bring one with me so I ended up putting a 1.4 extender onto a 70-200mm f/2.8 zoom, effectively giving me a 100-280mm f/4. Not as small an aperture, or as fast focusing as it could be, but needs must.
What follows is the gist of my 1/2 day birds in flight workshop condensed into a three paragraphs...

Canon EOS 1DX, EF70-200 f/2.8L IS II + 1.4x III, 1/1600 sec, f/4, ISO 640
Your camera is going to need all the help it can get to lock onto the speeding Puffin, so there are a few settings you should adjust before you start snapping away. First, if your lens has a focus limiter on it, set this appropriately. Rather than having my lens set on full focus range, I selected the alternative 2.5m-infinity setting to stop it wasting time looking for Puffins that would be too close to photograph. This can greatly speed up focusing. I popped the lens' image stabiliser onto mode 2 (equivalent to sport mode on some lenses) as this prevents it from fighting against the panning action that you will be using to follow the bird. In fact, at the high shutter speeds we'll be using for Puffins image stabilisation has minimal impact, so don't worry too much of your lens doesn't have it. Set a high shutter speed. 300mm on a full frame needs 1/2000 second (or 1/1600 if you can pan the camera smoothly). For most cameras, automatic tracking won't work well so you'll need to select a single focus point (or maybe single point with four helper points if you have that mode). Select the centre point as this is often the most sensitive AF point on the camera - you can crop the image later post production to improve composition aesthetics. If you have one of the new breed of AF models (currently - July 2016 - that's one of the following Canon 1Dx, 1Dx II, 7D II, 5DS, 5DR, Nikon D5, D500) then you can select the all focus points mode where you select the initial point (this later bit is buried in a menu on the 7D II). On the above Canon models, it's important to also set the right AF mode - I would recommend trying mode 5 or 6 and maybe adjusting the parameters a bit to be more sensitive. I strongly suggest avoiding mode 1, which might be more realistically named 'always miss' mode. At the risk of stating the glaringly obvious, remember to use AI servo / AF-C and set the fastest frame rate that your camera can manage (having a fast memory card will help quite a bit with frame rate).
I prefer to shoot birds in flight in manual exposure mode. I do this because in aperture or shutter priority mode, the camera all too often gets fooled into changing the exposure as the background changes: as you track against dark grass it ups the exposure ruining white highlights on the feathers, then as you follow the bird into the sky it underexposes the bird giving you a silhouette. Pop the camera into manual, set the shutter speed to 1/2000 and take test shots of birds adjusting the aperture and ISO values until the bird is nicely exposed. (A polarising filter can help keep the sky blue rather then turning white ... but it will also slow down autofocus quite a bit). In terms of ISO, you may find yourself setting a higher value than you'd like. My feeling is that it's better to use high ISO and have a slightly noisy sharp picture, thanlower the shutter speed to give noise free but motion blurred photos. Many people like to hand hold their camera for flight shots, and camera shake is generally eliminated at speeds of 1/2000 sec and above. I prefer to use a tripod because the camera-lens combination is heavy, and I'm a bit of a wimp. If using a tripod, you'll need a very smooth, fast head such as a gimbal, top-end fluid head or (my personal choice) axis limited ball head e.g. Uniqball. Normal ball heads tend to flop about sideways rather than simply pan and tilt which makes things quite hard. Also, poorer quality ball heads and fluid heads usually have less precise friction controls which makes getting the right tension for turning quickly but smoothly impossible.
Spend a good while watching the Puffins to see how they fly, which approach directions they come from and where they tend to go - you'll soon notice that they follow similar flight paths depending on their end destination. High contrast is usually easiest for the camera's autofocus - that effectively means Puffins against the sky, or sea... or a featureless distant grass background will be easier than those flying across areas with patterns, lines or close to a background.
Right - time to actually take some photos, at last! To help the camera, remember that the Puffin needs to be a reasonable size in the frame - rather than a dot in the distance - to get an AF lock. My usual rule of thumb is: if the bird is smaller than the central circle in the viewfinder, then it's too far away to focus on properly. Try and resist the temptation to focus too early when the target is small. I pre-focus my camera around the distance that the Puffins would fill the central viewfinder circle. I usually look for a Puffin flying along a flight path I've noted before, track it (without pressing the focus button) through the viewfinder until it reaches a decent size and then use the focus button to lock on (aiming at the head rather than the wings/body) , following the Puffin until it's close enough to be a good large size in the picture (it may seem easier to photograph the Puffins further away, but by the time you've blown up the image the quality will be significantly reduced). . I suggest bursts of 3 - 5 images when you feel that you've got a lock - the autofocus is blind when the mirror swings upwards to take the photo so you don't want to leave your finger glued to the shutter button for too long. Ideally, you should be aiming to shoot just before the bird becomes parallel to you, If you lose focus at any time, let go of the focus button completely, then try to find the Puffin again and depress the focus button when you've got it. If you keep your finger pressed down after the camera loses focus it's very unlikely that the camera will lock on again. That's it. Remember to review your images at 100% magnification on the LCD screen and check for the eyes being sharp (and open - Puffins blink a lot...). This sort of flight shot isn't easy - it can take a while to get your eye in, even if you regularly photograph birds in flight. You'll almost certainly need a bit of patience before your hit rate starts to increase.
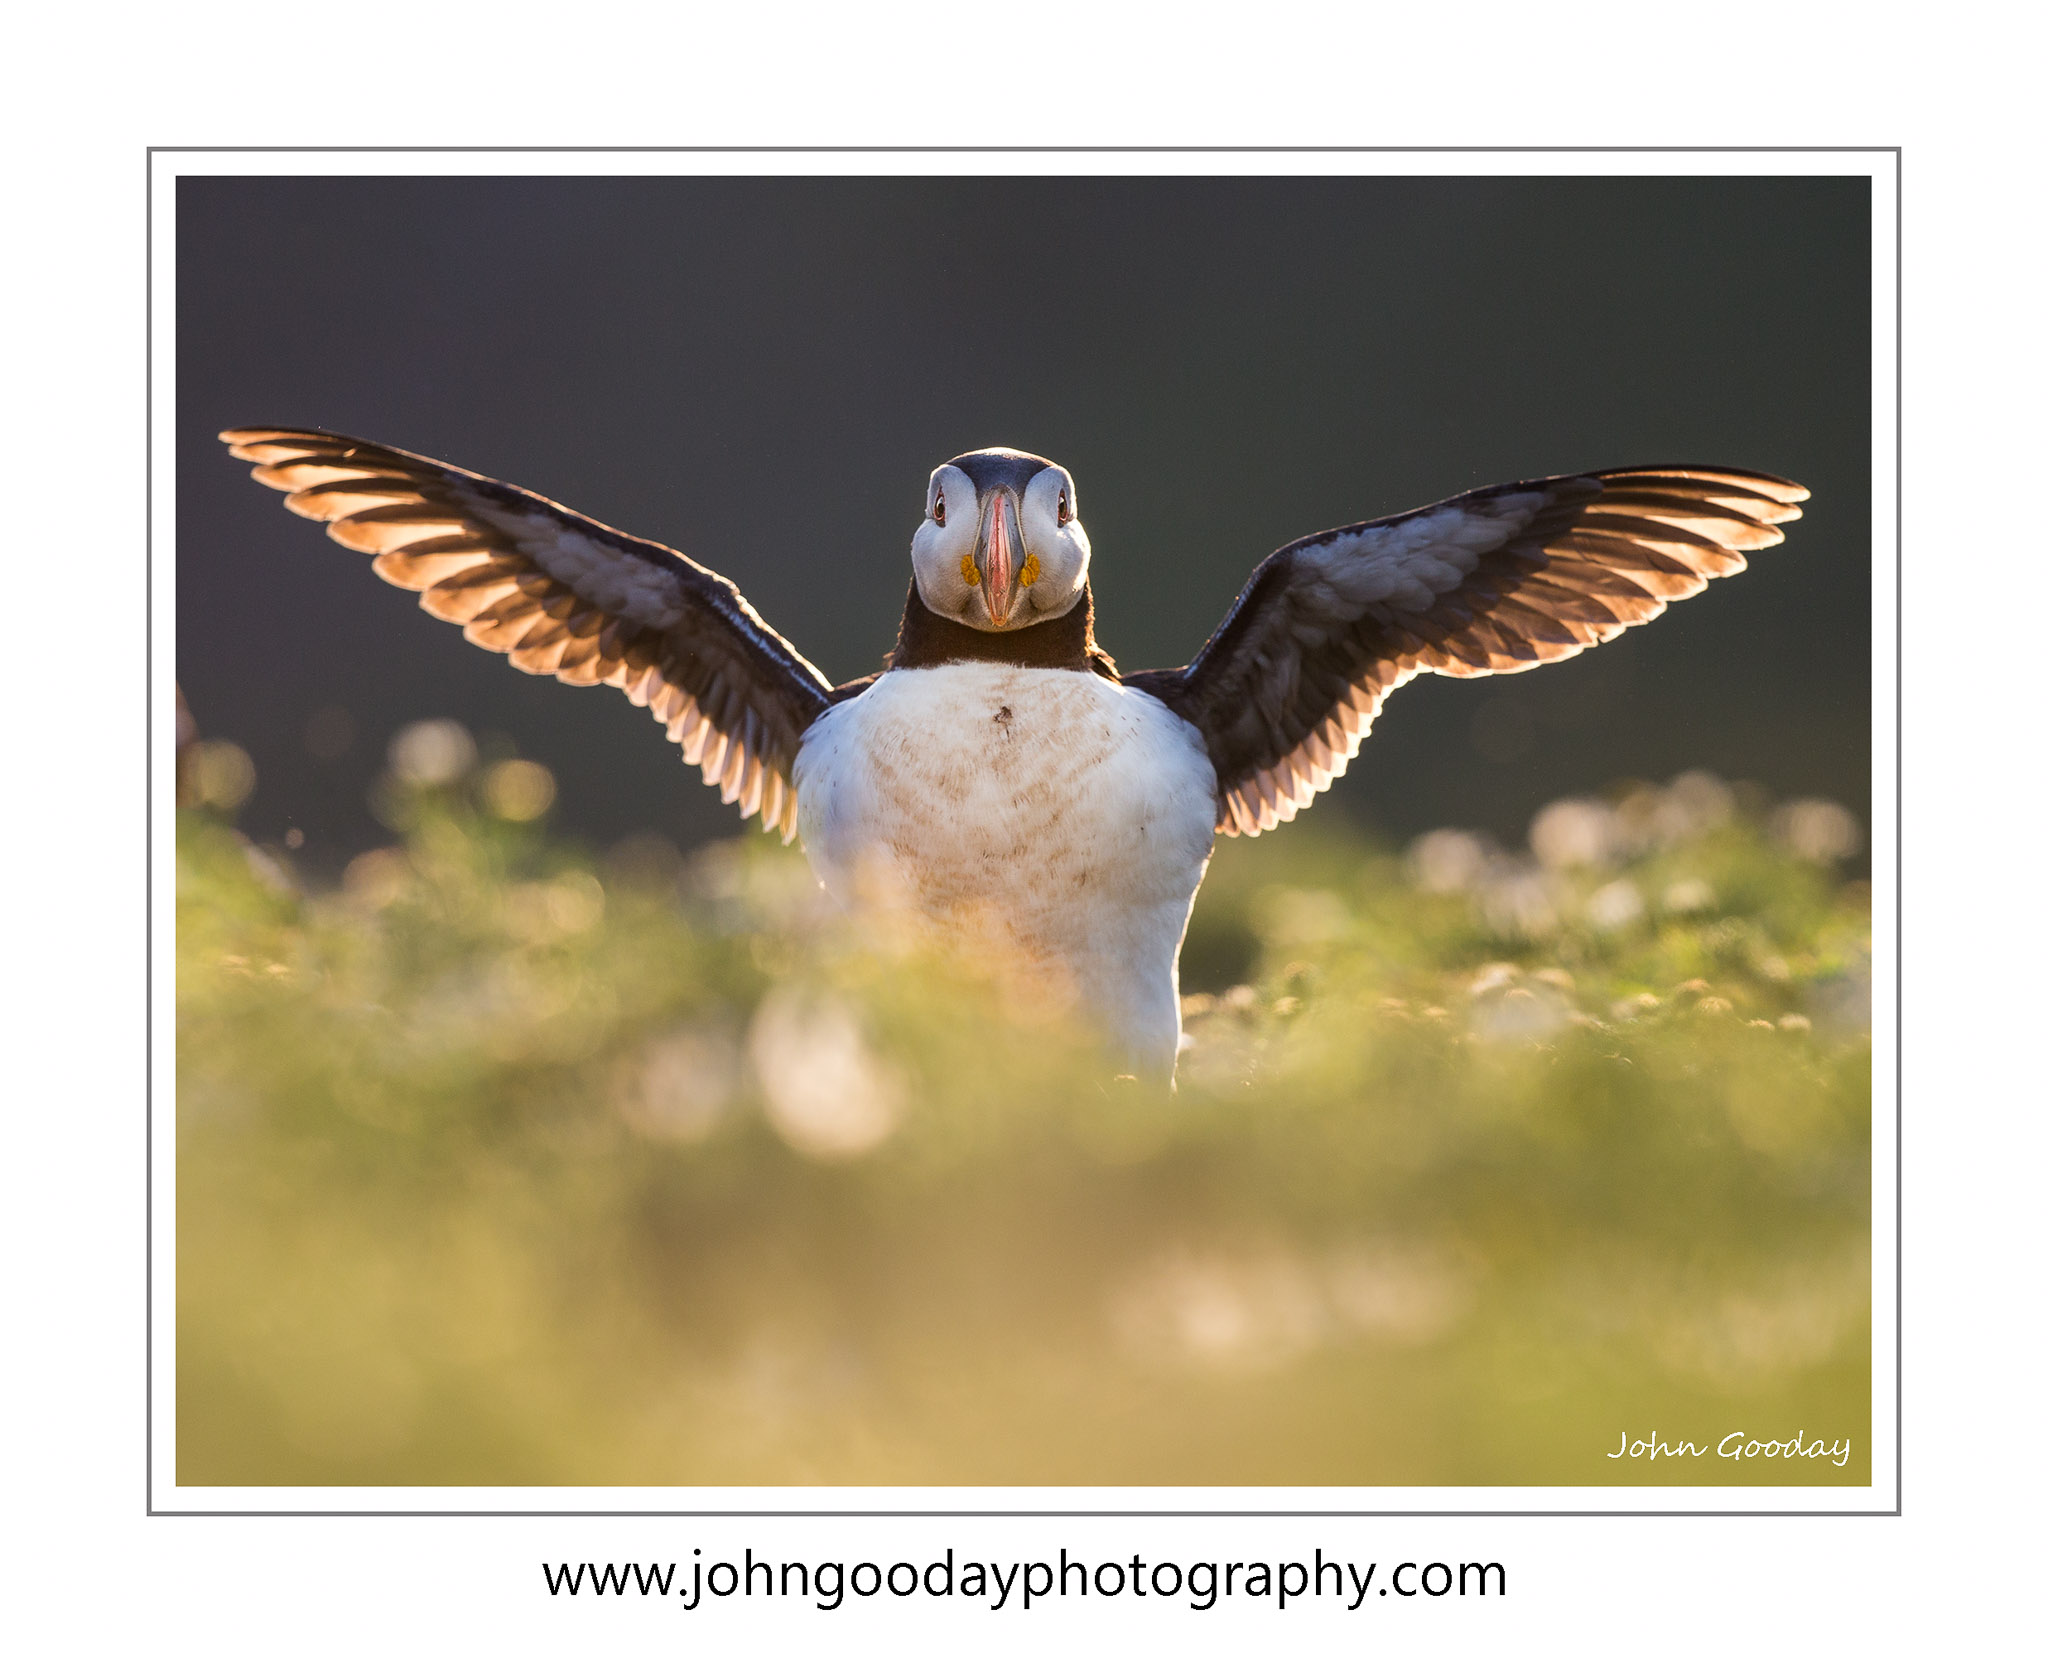
Incoming, against the sun

Canon EOS 1DX, EF500mm f/4L IS II, 1/2000 sec, f/5.6, ISO 1600
This is a much easier shot than sideways flight, and, if the light is right, has more impact, I think. The camera settings are the same as the previous flight shot, as is the technique of pre-focusing then tracking the bird as it gets close. You won't need to move the camera that much if the bird is coming straight at you, which makes the task a lot simpler. You can put the camera lens in to image stabilisation mode 1 if you like, as you are not tracking across the sky anymore. An added factor to consider when setting the exposure is the backlighting. When adjusting the manual exposure, the aim is to get a setting that just allows a little clipping in the backlit white feathers (see the Puffin's shoulders) but nowhere else. Use your camera's highlight warning function (the setting that makes blown highlights flash red when you review the image on the back of the camera) to tweak the exposure settings during test shots. Ideally, a dark background such as a hill or rock in shadow, with the sun behind and above, will emphasise nice light through the feathers. Where you take the picture depends on where this nice light occurs - I had to change to a 500mm lens as 300mm was a little short to catch the backlight which occurred when the Puffin was a bit far out. You'll need to position yourself so that the backlight hits close to landing points if you want to catch the outstretch wings. As the light moves, you'll have to move your camera and shoot different areas. The aperture you select will determine how much of the Puffin is in focus - with the 500mm I found f/5.6 to f/8 gave me a good area of focus from the head to the feet (f/4 left the feet blurred). With a shorter lens, obviously a larger aperture would be needed. These images work best at the end of the day when the light is relatively subdued in brightness. Unfortunately, you'll find that the exposure to keep the wings correctly lit will result in the rest of the Puffin being underexposed. There little than can be done about this (well, actually I have a rather elaborate and cunning plan for next time which I'll document if it works) save boosting the lower mid-tones in post processing. For this reason, a camera that performs well at high ISO is a real benefit as amplifying the dark areas of the bird will also increase the visibility of any digital noise in these areas.

Canon EOS 1DX, EF500mm f/4L IS, 1/2000 sec. f/5.6, ISO 1600
General information
For the best photography conditions, you'll need to stay overnight on the island - day trippers only stay from 10am - 4pm and the nicest light occurs well outside these times). All overnighters have to stay at a hostel run by Welsh Wildlife. It's quite basic (shared rooms, limited electricity and hot water) and places are rare. You'll need to take all your own food onto the island with you, and bring all your rubbish back home. You can book via http://www.welshwildlife.org/overnight-accommodation-on-skomer/. I choose to go with Nature's lens, a photographic tourism company based in the UK. They are licensed to run workshops on Skomer and have block bookings at the hostel in June and July. They arrange everything, including food, and their guides can tell you the best places to visit and at what time. You can book with Natures Lens at http://natureslens.co.uk/
In addition to Puffins in June and July, you can also photograph Gulls, Seals, Razorbills, Chough, Sheerwater (at night), owls and gulls.
Finally, one or two more pictures...

You're never far from a Puffin on Skomer.
Canon EOS 1DX, EF70-200mm f/2.8L IS II, 1/2000 sec, f/5, ISO 800

Puffin in its burrow
Canon 5D Mark III, EF70-200mm f/2.8L IS, 1/200 sec, f/7.1, ISO 250, EX600-RT Speedlight with 30cm softbox

One that got away! On the one evening of nice light, no Puffins with sand eels flew straight towards the camera. This was about the best angle I got. A good excuse to return to Skomer and try again...


